In the ever-evolving landscape of e-commerce, staying ahead of the curve and offering diverse payment options to your customers is essential. Integrating popular mobile payment platforms like Zelle, Venmo, Cash App, Apple Pay, and Meta Pay with your WooCommerce store can be a game-changer. In this comprehensive guide, we will walk you through the process of creating a customized payment gateway that seamlessly integrates these payment methods into your WooCommerce store. With the help of the Custom Payment Gateways for WooCommerce plugin, you can enhance the checkout experience for your customers and expand your payment options.
Why Diversify Your Payment Options?
Before we dive into the technical aspects of integration, let’s discuss why it’s essential to offer diverse payment options. The modern consumer is all about convenience, and providing multiple ways to pay for products or services can significantly improve the user experience. Zelle, Venmo, Cash App, Apple Pay, and Meta Pay are increasingly popular, especially among mobile users. By integrating these payment methods, you cater to a broader audience and potentially increase your conversion rate. It’s a win-win situation for both you and your customers.
Step 1: Creating an Offline WooCommerce Custom Payment Gateway
The foundation of integrating Zelle, Venmo, Cashapp, Apple Pay, and Meta Pay with WooCommerce is to create a custom payment gateway. Here’s how you can do it:
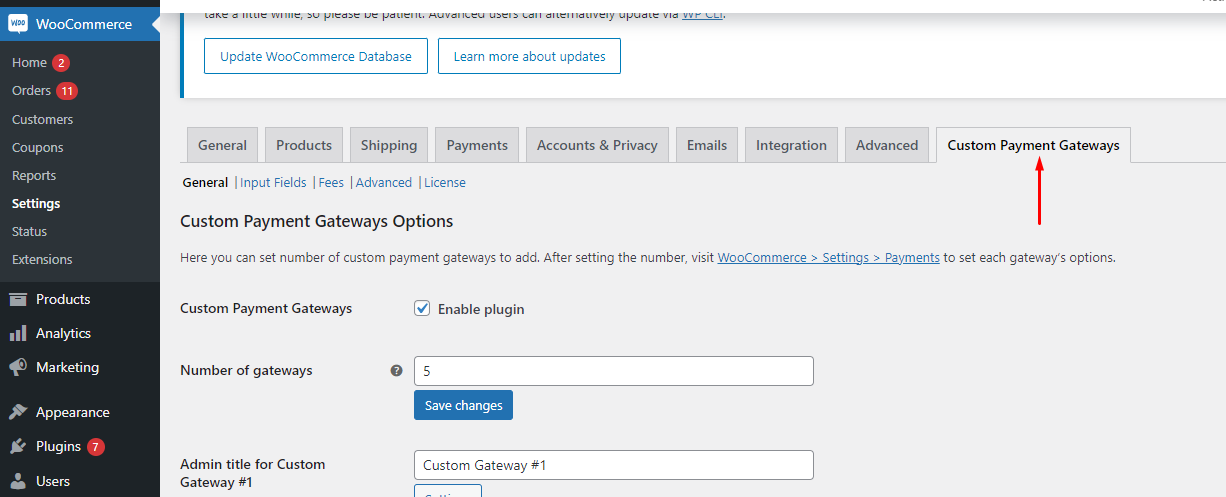
- Install Custom Payment Gateways for WooCommerce Plugin: To get started, you need to install the Custom Payment Gateways for WooCommerce plugin. Once installed, activate it.
- Custom Payment Gateway Setup: Navigate to your WordPress dashboard and go to WooCommerce > Settings > Payments. You will see the newly added custom payment gateway options. Click on the “Custom Gateway” to configure it.
- Gateway Settings: In the “Custom Gateway” settings, you can name your gateway, set a description, and choose an icon to represent it. This step helps users identify the payment method they want to use.
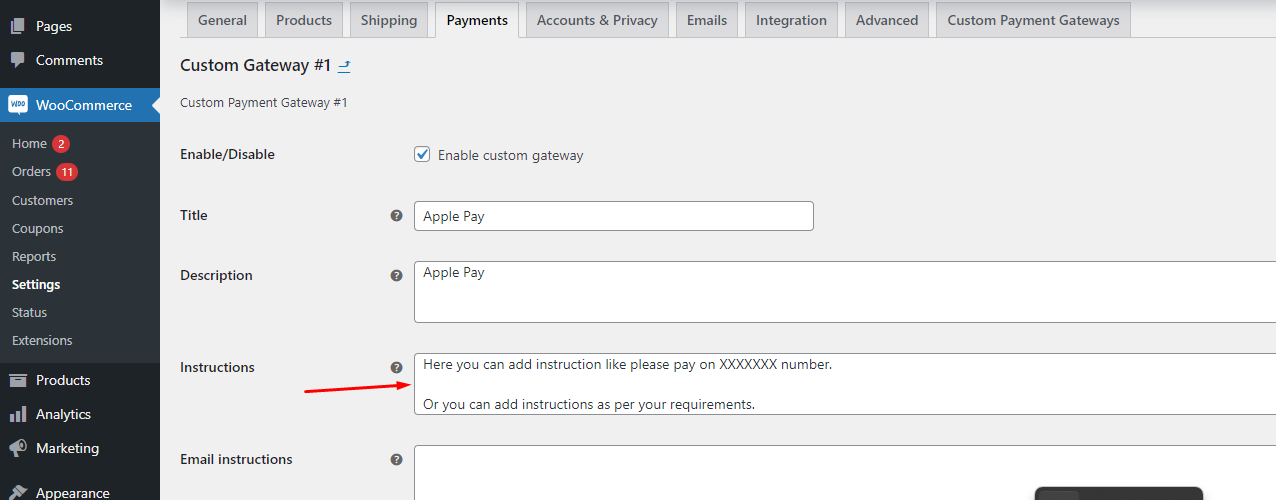
- Payment Method Configuration: In this section, you can configure your custom payment gateway to accept Zelle, Venmo, Cash app, Apple Pay, and Meta Pay. Each of these methods has its requirements, and you may need to consult their respective documentation for specific integration details.
- Testing and Troubleshooting: Before making this custom payment gateway live, it’s crucial to thoroughly test it. You should conduct multiple test transactions to ensure that payments are processed correctly and that customers are redirected to the desired page.
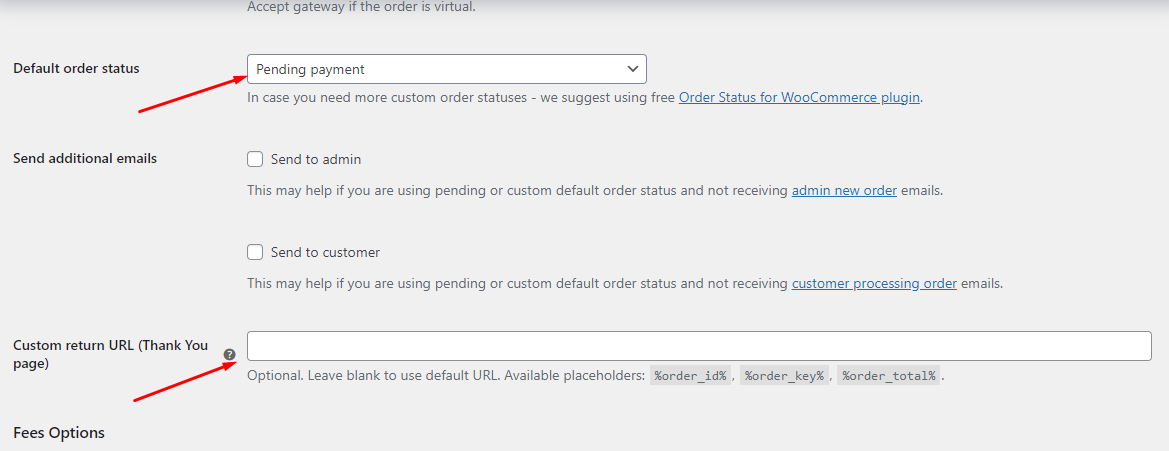
- Set Order Status: By default, the order status will be “pending.” This is normal as the payment process progresses. As the store owner, you can update the order status to reflect the actual state of the transaction.
- Custom URL for Redirect: The Custom Payment Gateways for WooCommerce plugin also allows you to set a custom URL to which customers will be redirected after a successful payment. This feature provides you with the flexibility to guide customers to a specific page on your site, rather than the default “Thank You” page.
Step 2: User-Friendly Instructions
User experience is crucial in any e-commerce integration. It’s essential to provide clear instructions to your users to ensure a smooth checkout process. Here’s how you can do it:
- Frontend Integration: Your customers should see clear and user-friendly instructions on the front end of your WooCommerce store. Make sure they understand the payment options and the steps they need to follow.
- Payment Selection: When customers proceed to checkout, they should be able to select their preferred payment method, such as Zelle, Venmo, Cash App, Apple Pay, or Meta Pay. The user interface should be intuitive and straightforward.
- Payment Process: Provide step-by-step instructions on how the payment process works for each method. For example, explain how to scan a QR code for a Venmo transaction or how to use Apple Pay for a one-click payment.
- Contact Information: Make sure customers know where to reach out for support or questions. Offering excellent customer support is vital to build trust with your customers.
Step 3: Custom URL and Redirection
One of the benefits of the Custom Payment Gateways for WooCommerce plugin is the ability to set a custom URL for redirection after payment. This feature allows you to guide customers to a specific page on your website. Here’s how it works:
- Custom URL Configuration: In the plugin settings, you can specify the URL to which customers should be redirected after a successful payment. This URL can be a “Thank You” page, a receipt page, or any other relevant destination.
- Enhanced User Experience: By redirecting customers to a custom page, you can offer them a more personalized experience. You might consider a page that offers additional product recommendations or invites customers to join your newsletter.
- Engagement Opportunities: The custom URL redirection provides an opportunity to engage customers further, such as inviting them to follow you on social media, sign up for exclusive offers, or leave a review.
Step 4: Monitoring and Order Status Updates
After integrating Zelle, Venmo, Cashapp, Apple Pay, and Meta Pay with your WooCommerce store, it’s essential to monitor the order status and make necessary updates. Here’s what you should keep in mind:
- Order Processing: Keep a close eye on the order status as payments are made. Understand that certain mobile payment methods might have different processing times. Communicate with customers if there are delays in payment confirmation.
- Updating Order Status: As the store owner, you have the authority to update the order status as it progresses through the fulfillment process. It’s essential to maintain transparency with your customers by providing updates on their orders.
- Customer Notifications: Ensure that customers receive notifications regarding order updates. This can be done via email, SMS, or through your WooCommerce store, depending on your communication preferences.
Conclusion
Integrating Zelle, Venmo, Cashapp, Apple Pay, and Meta Pay with WooCommerce payment gateways is a strategic move that can enhance your e-commerce business. By creating a customized payment gateway and providing user-friendly instructions, you can offer your customers a seamless and convenient checkout experience. Moreover, utilizing the custom URL redirection feature allows you to engage your customers further and increase the chances of repeat business. Don’t forget to monitor order statuses and keep customers informed at every step of the process. With these steps, you can embrace the future of e-commerce and cater to the diverse preferences of your customer base.
Diversifying your payment options has never been easier. With a single, straightforward integration using the Custom Payment Gateways for WooCommerce plugin, you can unlock the potential of Zelle, Venmo, Cashapp, Apple Pay, and Meta Pay, and offer a more inclusive shopping experience to your customers.


